How to Use a Track Saw
 The track saw is one of the most popular tools among DIYers and professional woodworkers. These versatile power tools make cutting through wood quick and easy. They can cut accurate straight lines through sheet materials, chop through lumber, and trim doors and floors, all while leaving smooth, finished edges. Using a track saw might seem confusing at first, but with a few simple tips, you can use your new tool safely and efficiently for a variety of woodworking projects.
What Material Can You Cut?
The first thing you should keep in mind is that track saws, also commonly called plunge saws, are designed for cutting through wood-based materials such as plywood, lumber, trim, and melamine. Never try to use your tool to cut through non-wood materials like ceramics, steel, or aluminum. Doing so can damage your saw and pose safety risks to the operator.
Selecting the Blade
The next step is to choose the right blade. Since the blade will be cutting through your workpiece, it’s essential to ensure that it’s the right tool for the job. For general use, a blade with 14 teeth is perfectly acceptable, but a blade with 48 teeth is ideal for working with melamine and plywood and achieving a more finished, smoother edge.
Adjust Cutting Depth
The cutting depth determines how deeply the blade cuts. Some manufacturers suggest you avoid cutting through wood with a depth of less than 1/8” inches. The most important thing to remember is that the depth shouldn’t be so deep that it will hinder accuracy, but it should be deep enough to eliminate the risks of blade damage and kickbacks.
Track Rails
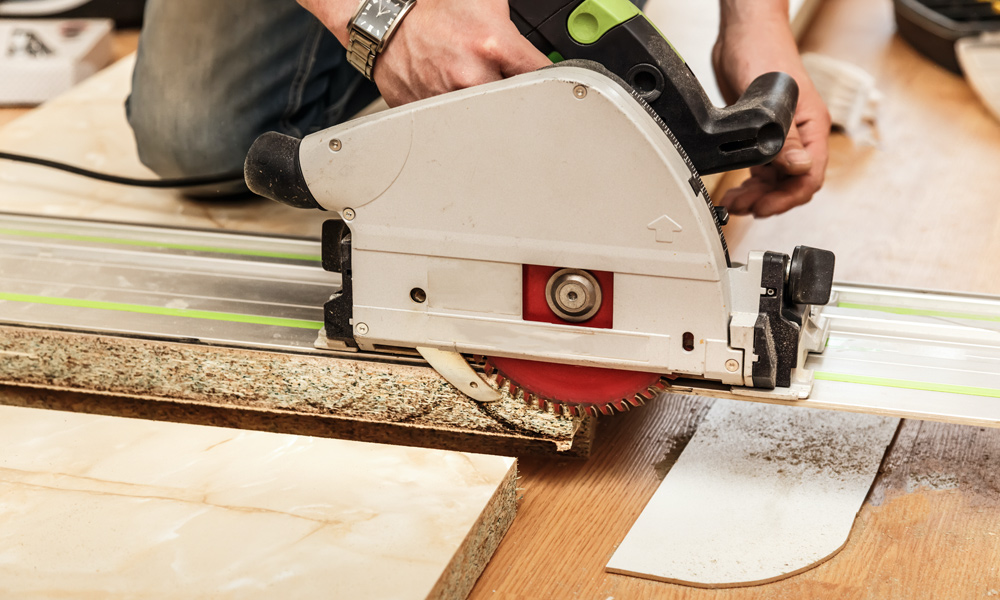
One of the major benefits of using a track saw is that you can use a guide rail with it. A guide rail allows you to make perfectly straight cuts through sheet materials such as plywood, doors, and melamine. It’s secured to your workpiece with strips or F-clamps, allowing you to glide your saw along your cut line smoothly.
Plunge Cuts
Another benefit of the track saw is that they can also make plunge cuts. You can place your blade over any area of your workpiece, even in the middle, and cut straight into it. Before making plunge cuts, the main thing to consider is that, unlike straight cuts, you won’t see your cut path. This means that if you want to be safe, you should make sure your cutting path is clear of any obstacles before plunging your blade into the material.
Starting your Tool
Track saws require you to enable both the plunge release and the power trigger. First, you’ll hit the plunge release, which extends the blade from the tool’s housing. Then, simply press the trigger to activate the motor before letting go of the plunge release. By pressing both switches, you’ll successfully turn your saw on and be ready to tackle your cutting project.
Let Your Blade Reach the Desired Speed
Once your tool is activated, don’t just jam it into your workpiece. Operating at the wrong speed can damage your workpiece and cause safety risks like kickbacks. Instead, pull the trigger and let the blade reach the ideal speed before beginning your cut. A blade that’s spinning at the right velocity will cut faster, cleaner, and more precisely.
How to Connect a DEWALT Track Saw
One of the best things about a DEWALT track saw is the ability to use your power saw with a rail guide system like the TrackSaw system. This will allow you to attach your tool to the base of the track and glide your blade along long surfaces, leaving perfectly straight cuts on your workpiece. To utilize this feature with your DEWALT TrackSaw Kit, simply purchase a guide rail at the desired length and secure your saw on the rail.
Once in place, you can achieve precise, straight cuts in any wooden material. And for longer cuts, you can purchase track connectors. They allow you to join several guide rails together, helping you tackle even the longest of cuts with ease and accuracy.
How to Set Up a Festool Track Saw?
 Another great company making plunge saws is Festool. This company manufactures quality tools that are just as simple to operate as the DEWALT TrackSaw system. To set up your Festool Track Saw, you need to fit the tool securely onto the guide rail.
When you put your tool on the rail, you’ll notice a bit of play between the machine and the track. Tighten the cams on the base plate to tighten the fit until there is no play at all. Make sure that you don’t overtighten the cams, though, because, while you don’t want any play between the saw and track, you also want it to glide smoothly without resistance. Once you’ve achieved the proper fit, the next step is to trim the splinter guard.
This strip is made to overhang past the edge of the guide rail. Once you’ve secured the saw to the track, run the saw along the rail to cut off the excess portion of splinter guard. Then, clip the splinter guard to the machine, and you’re ready to tackle a wide variety of woodworking projects.
How to Change the Blade on a Track Saw
Several brands are making great track saws today, but the one thing all these tools all have in common is that they’re incredibly easy to use. While there might be some minor differences between models, most have a quick and easy blade change system that allows you to swap out blades in a matter of seconds.
Most models require you to engage the plunge mechanism to expose the blade and simply remove the arbor bolt. This will allow you to remove the old blade and install a new one. Once a new blade is in place, tighten the arbor bolt, and your tool is ready to resume operation.